What are some DIY projects I can make using power tools?
The Science of Batteries: Understanding the Technology Behind Power Tool Energy Sources
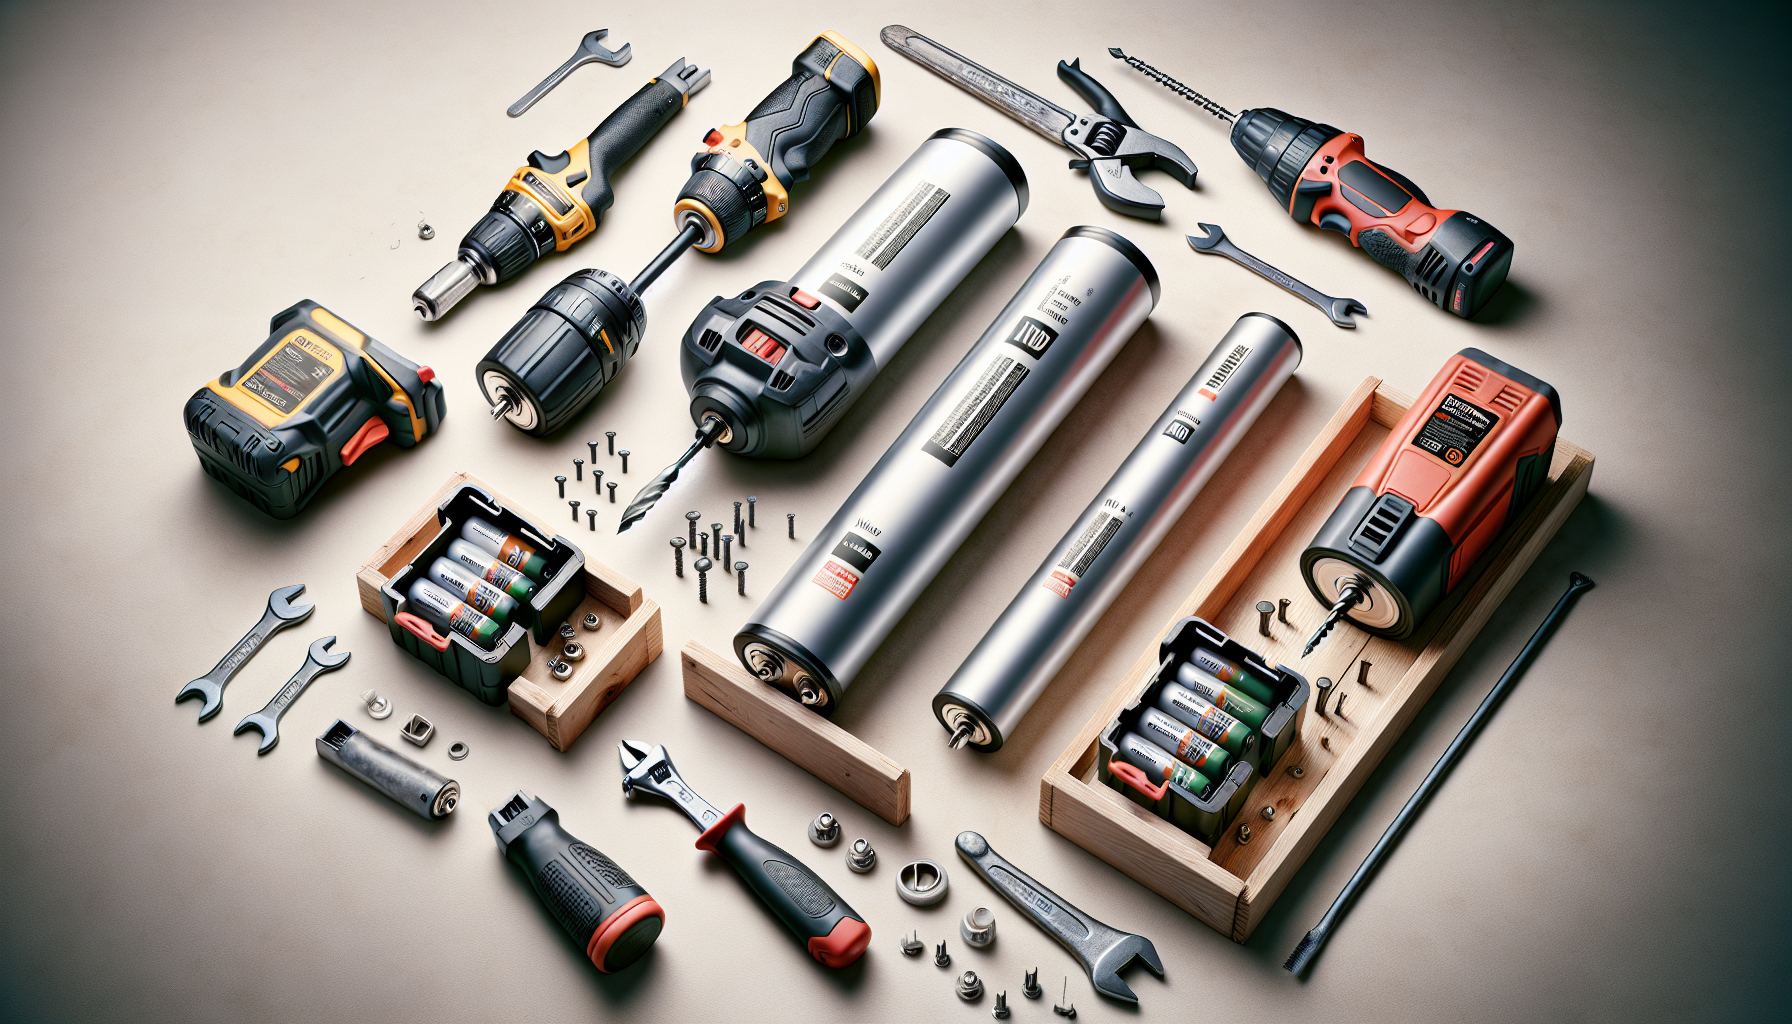
Power tools are primarily powered by batteries that fall into various categories, each with unique energy sources and technology. The most common types include:
1. Lithium-Ion Batteries: These are the most popular choice for modern power tools due to their high energy density, lightweight design, and minimal self-discharge rate. Lithium-ion batteries typically offer longer run times and charge faster than older battery types, making them ideal for professionals and DIY enthusiasts alike. They also support various voltage options, allowing for versatility in power tools.
2. Nickel-Cadmium (NiCd) Batteries: Although largely phased out in favor of lithium-ion, NiCd batteries are still used in some older models. They are known for their durability and resistance to extreme temperatures, but they suffer from memory effect issues, which can reduce overall capacity if not regularly fully charged and discharged.
3. Nickel-Metal Hydride (NiMH) Batteries: NiMH batteries provide a step up from NiCd batteries, offering higher capacity and less environmental impact. They don’t have a memory effect but are heavier and can have a higher self-discharge rate compared to lithium-ion batteries.
4. Lead-Acid Batteries: Primarily used in larger power tools or stationary applications, lead-acid batteries provide a good balance of cost and performance. They are generally heavier and less efficient than lithium-ion batteries, but they are still popular in specific contexts where weight is less of a concern.
Understanding the advantages and limitations of each battery type helps users select the right tool for their needs. For more information about power tool usage and maintenance, check out our guide on power tool batteries.
Ensure a Perfect Fit: How to Choose and Change Power Tool Blades
Selecting and replacing blades for power tools is crucial for optimal performance and safety. Here are key considerations to ensure you make the right choices:
### Selecting the Right Blades
1. Type of Material: Different blades are designed for different materials. For wood, choose a carbide-tipped blade, while for metal, a bi-metal or high-speed steel (HSS) blade is best. For specialty jobs, consider diamond blades for masonry or tile.
2. Size and Compatibility: Ensure the blade fits your specific power tool. Standard sizes are often available, but double-check your tool’s manual for dimensions and compatibility to avoid fitting issues.
3. Teeth Configuration: The number and shape of teeth affect the cut quality. Fewer teeth (e.g., 24) for fast cuts on soft materials, while more teeth (e.g., 60 or more) yield smoother finishes on fine work.
4. Cutting Speed: Review the blade’s RPM rating. Operating above the recommended speed can lead to damage and safety hazards. Therefore, match the speed with your tool specifications.
5. Brand Quality: Opt for trusted brands such as DeWalt, Bosch, and Makita known for durability and performance. Quality blades may have a higher initial cost but save money in the long run due to longevity.
### Replacing Blades
1. **Safety First**: Always ensure the power tool is unplugged or the battery is removed before changing blades. Use appropriate safety gear, including gloves and goggles.
2. **Using the Right Tools**: Most blades come with a fastening mechanism, such as screws or a latch system. Use the specific tools required (often provided with the tool) to loosen and remove the existing blade.
3. **Aligning the New Blade**: When installing a new blade, ensure it’s oriented correctly according to the directional arrows on the blade or tool. Misalignment can cause vibration and poor cuts.
4. **Tightening the Fasteners**: Ensure the new blade is securely fastened. Loose blades can lead to accidents. Remove any play before plugging in the tool to test.
5. **Regular Inspection**: Check blades regularly for wear or damage. Dull or chipped blades should be discarded or sharpened to maintain effective cutting performance.
By carefully selecting and replacing blades, users can maximize the efficiency and safety of their tools, making every project more manageable. For more on power tool safety, refer to our article on electric hand drill features or explore power tool maintenance tips.
How to Choose the Perfect Power Tool for Every DIY Project: A Comprehensive Guide
Choosing the best power tools for your DIY projects requires careful consideration of multiple factors including the type of project, the tool’s versatility, and safety features. Here are some important aspects to keep in mind:
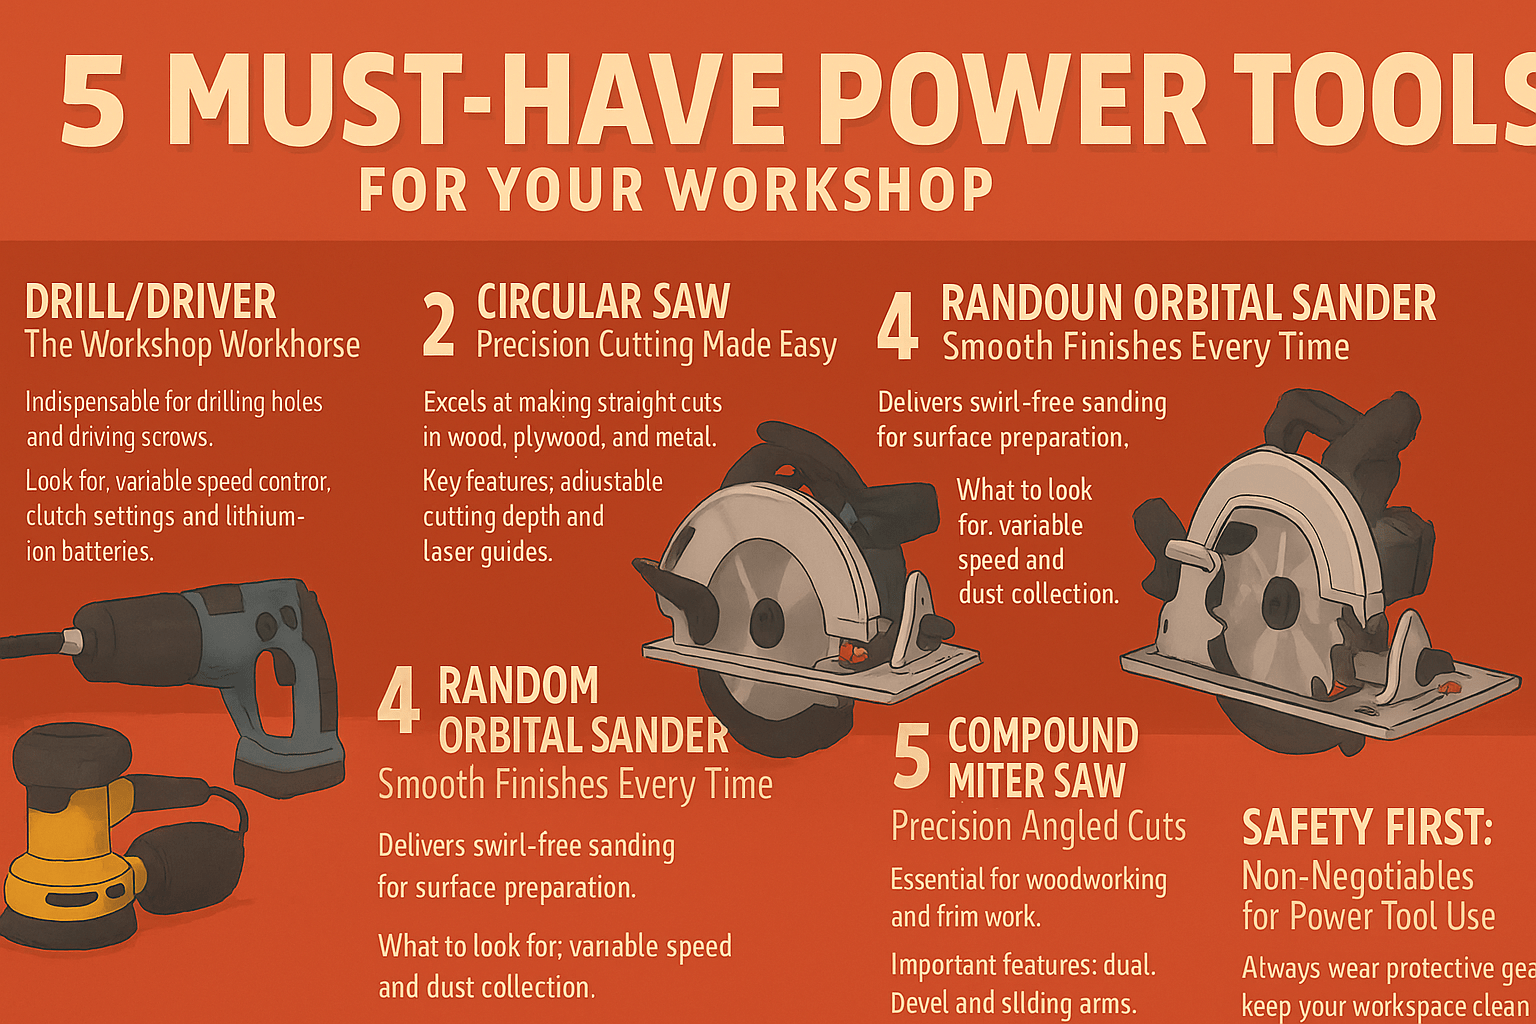
1. Type of Project – Identify what tasks you’ll be undertaking. For woodworking, an electric hand drill is essential for drilling holes and driving screws, while a circular saw or jigsaw is needed for cutting materials. For more intricate projects, a rotary tool may provide the required precision.
2. Tool Versatility – Opt for tools that offer adaptability. For instance, many electric hand drills come with multiple attachments making them suitable for drilling in wood, metal, or plastic. Tools like oscillating multi-tools can perform various functions from sanding to cutting, which is ideal for limited workspace.
3. Safety Features – Always prioritize tools with built-in safety mechanisms, such as automatic shut-off features and ergonomic designs. Adhering to best practices, such as wearing protective eyewear and gloves, further reduces the risk of accidents. For comprehensive safety tips, refer to our article on safety tips for using power tools.
4. Brand Reliability – Choose reputable brands known for their quality and service. Brands like DeWalt, Makita, and Ryobi are popular among DIY enthusiasts for their durability and performance.
5. Budget Considerations – Your budget plays a crucial role in tool selection. There are excellent mid-range options available that provide high performance without breaking the bank. Check out our exploration of essential power tool brands for homeowners for more guidance.
For a more focused tool selection, consult specific articles such as features of a good electric hand drill and power tool usage projects to tailor your choices effectively for your upcoming DIY endeavors.
The Drill Down: Understanding and Preventing the Causes of Power Drill Overheating
Power drills can overheat due to several factors including prolonged use, insufficient ventilation, and dull drill bits. When a power drill is continuously operated without breaks, it can generate excessive heat that leads to motor burnout. Using a drill in areas with inadequate airflow can further exacerbate the overheating, as the motor’s heat cannot dissipate effectively. Additionally, dull or damaged bits increase friction, causing the motor to work harder and heat up more quickly.
To prevent overheating, consider implementing the following techniques:
1. **Take Breaks**: Allow your drill to cool down by taking breaks during long tasks. This helps maintain the motor’s temperature.
2. **Use Sharp Bits**: Regularly check and replace dull bits. Sharp bits require less force, reducing the risk of overheating.
3. **Ensure Proper Ventilation**: Work in an area with good airflow. Avoid covering ventilation holes on the drill to ensure that heat can escape.
4. **Don’t Overload the Drill**: Always use the right type and size of drill bit for the material being drilled. Overloading can strain the motor, leading to overheating.
5. **Maintain Your Tool**: Regularly clean and service your drill according to the manufacturer’s guidelines. Dust and debris can impede airflow and cause overheating.
By following these techniques, you can enhance the longevity and efficiency of your power drill while reducing the risk of overheating. [Source: One Power Tool]
Breathe New Life into Your Tools: A Comprehensive Guide to Power Tool Repair
To effectively repair and maintain your power tools, follow these guidelines to extend their lifespan and enhance functionality.
### Regular Cleaning
Always clean your power tools after use, removing dust, debris, and oil. For electric tools, use a soft brush or compressed air to blow out dust from vents. Regular cleaning prevents overheating and ensures optimal performance.
### Lubrication
Proper lubrication is key to maintaining moving parts. Use manufacturer-recommended lubricants for gears and motor components. This reduces friction and wear, thus prolonging tool life. Check your tool’s manual for specific lubrication intervals.
### Battery Care
For battery-operated tools, ensure batteries are stored in a cool, dry place and charged properly. Avoid letting them fully discharge. Follow the battery maintenance guide to maximize lifespan.
### Inspection and Repairs
Periodically inspect power tools for signs of wear, such as frayed cords or dull blades. Replace parts as necessary. For example, sharpening drill bits can improve drilling efficiency. If you encounter issues like stripped screws, refer to our article on safely removing stripped screws.
### Proper Storage
Store power tools in a dry environment to prevent rust and corrosion. Use toolboxes or racks for organization, ensuring tools are not left exposed to moisture. This routine helps in keeping your tools functional and ready for use.
### Utilizing the Right Accessories
Always use the right attachments and accessories that fit your type of power tools. Incorrect attachments can cause excessive wear or even damage the tool. For specific accessory usage, check out our guide on power tool practices.
By adhering to these maintenance and repair strategies, you can significantly enhance the life and effectiveness of your power tools, ensuring they perform well when you need them most.
Useful Tips for Extending the Life of Your DeWalt Batteries
To ensure the longevity of your DeWalt batteries, follow these practical tips:
1. **Charge Regularly**: Keep your batteries charged but avoid letting them sit on the charger for extended periods. It’s best to remove them from the charger once fully charged.
2. **Avoid Complete Discharges**: Lithium-ion batteries, like those used by DeWalt, have a limited lifespan when fully discharged. Aim to recharge them when they reach around 20% to prolong their life.
3. **Store in a Cool, Dry Place**: High temperatures can damage batteries. Store them between 50°F and 86°F (10°C to 30°C). Avoid leaving them in extreme conditions, such as inside a hot vehicle.
4. **Clean Battery Terminals**: Regularly check and clean the battery contacts with a soft cloth to ensure a good connection. Dirt or corrosion can impair performance.
5. **Use Compatible Chargers**: Always use DeWalt chargers specifically designed for your battery model to avoid potential damage.
6. **Monitor for Damage**: Regularly check your batteries for any signs of swelling, leakage, or damage. If you notice these issues, discontinue use and replace the battery.
7. **Cycle the Batteries**: If you have multiple batteries, rotate their use. This cycling helps maintain their capacity and avoids overusing one battery.
8. **Temperature Considerations**: When using batteries in low temperatures, consider warming them up to room temperature prior to use, as cold can reduce their performance.
By adhering to these practices, you can help ensure your DeWalt batteries remain efficient and serve you well for years to come. For more detailed information on battery maintenance, check out our dedicated article on power tool batteries.
Power Drill Mastery: Advanced Tips for Drilling Precision Holes in Various Materials
To drill accurate holes with a power drill, it’s essential to master several techniques and skills that enhance precision and control. Here’s a comprehensive guide:
1. Select the Right Drill Bit: Choosing the appropriate drill bit for the material you are working with is crucial. For example, use wood bits for wood, masonry bits for concrete, and metal bits for metal surfaces. Each bit style is optimized for its respective material, allowing for cleaner cuts and reduced friction.
2. Mark Your Drill Points: Before starting, clearly mark the drilling point using a pencil or chalk. For increased accuracy, consider using a center punch to create an indent. This helps the drill bit remain stable and prevents it from wandering as you begin drilling.
3. Clamp Your Workpiece: Ensure that the material you are working with is securely clamped to prevent movement during drilling. This minimizes the risk of injury and ensures that the drill bit stays on target.
4. Use Proper Speed Settings: Adjust the speed of your drill based on the material being drilled. Slower speeds are generally more effective for tougher materials (like metal or concrete), while faster speeds work best for softer materials (like wood). Refer to the drill’s manual for speed settings that correspond with different materials.
5. Apply Steady Pressure: As you drill, apply consistent and moderate pressure to the drill. Too much pressure can overheat the bit and damage both the bit and the material, while too little may not penetrate effectively. Let the drill do the work.
6. Keep the Drill Perpendicular: Maintaining a 90-degree angle between the drill and the work surface is crucial for accurate holes. Consider using a drill guide or bubble level to assist in keeping the drill straight.
7. Clear Debris Frequently: Periodically pull out the drill bit to clear away debris that accumulates in the hole. This ensures better visibility and allows the bit to work more efficiently.
8. Practice on Scrap Material: If you’re new to drilling or working with a particularly challenging material, practice on scrap pieces first. This helps to refine your technique without the risk of damaging your project.
By following these techniques, you can significantly enhance your drilling accuracy and achieve professional results across various materials. For more tips on effectively using power tools, check out our guides on project planning with power tools and selecting the right electric drill.
Unlocking the Secrets of Thinning Shears: How They Work and When to Use Them
Thinning shears, also known as thinning scissors or texturizing scissors, are specialized gardening tools designed to remove excess foliage and reduce plant density without altering the overall shape. They feature one straight blade and one serrated blade, which allows for precision cutting while leaving some stems intact. This function is essential in various gardening and landscaping applications, including:
1. Haircut for Plants: Thinning shears help in managing overgrown shrubs and perennials, promoting better air circulation and sunlight penetration, critical for plant health.
2. Fine-Tuning Texture: For ornamental grasses and flowering plants, thinning shears can create a more pleasing texture and shape, enhancing the visual appeal.
3. Maintenance: Regularly using thinning shears can prevent overcrowding in garden beds, allowing plants to thrive and bloom effectively.
To use thinning shears effectively:
– Select the Right Time: The best time to use thinning shears is during the growing season, typically in spring or early summer when plants are actively growing. Avoid heavy pruning during dormancy.
– Identify Areas to Thin: Look for dead, damaged, or overcrowded areas. Focus on areas where branches or buds are crossing each other or competing for space.
– Technique: Hold the shears at a 45-degree angle, and use smooth, controlled cuts. Aim to remove about one-third of the foliage, carefully avoiding drastic changes to the plant’s form.
– Clean Cuts: Ensure the shears are sharp to prevent damaging the plants. Clean the tools before and after use to avoid spreading diseases.
For more information on maintaining tools for best gardening practices, visit our articles on power tool usage in projects and safety tips for using tools.
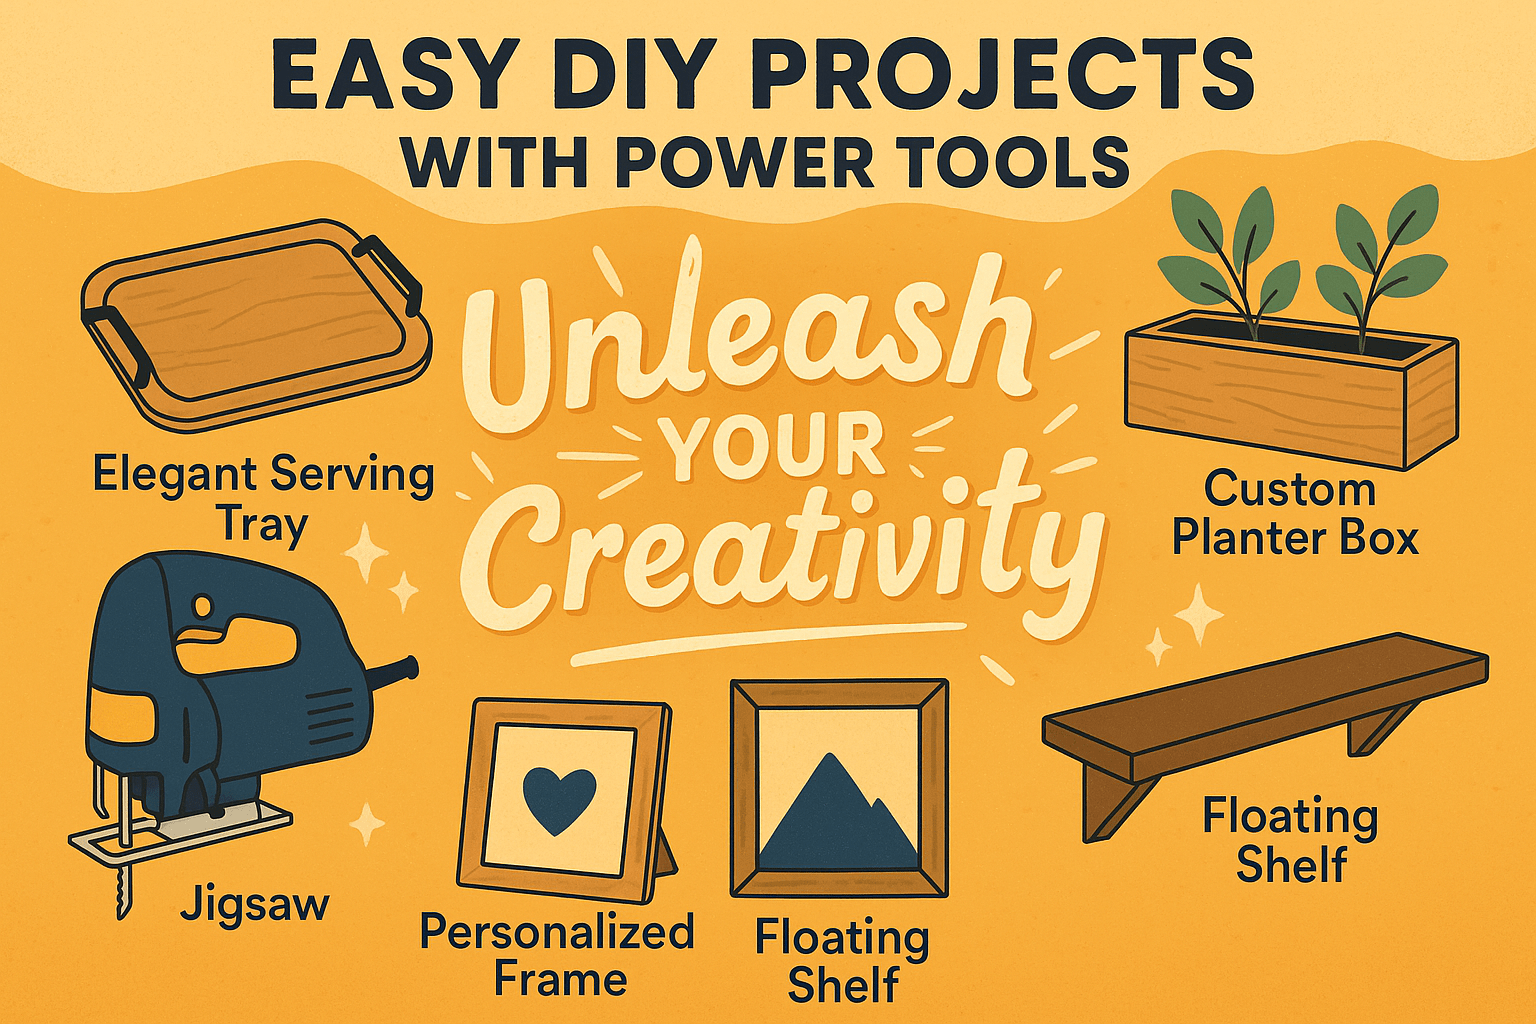
Build a Bookshelf
To create a functional and stylish bookshelf that enhances the character and organization of your space, consider the following tips:
1. Choose the Right Material: Opt for durable materials such as solid wood, plywood, or metal for a sturdy and stylish base. Each material can impart a different aesthetic to your bookshelf, catering to various design themes.
2. Design for Functionality: Tailor the size and layout to suit your needs. Consider open shelving for showcasing decor items or closed cabinets to hide clutter. Bookshelf height should also be proportional to your room’s dimensions.
3. Incorporate Personal Touches: Add elements like back panels with color or texture that reflect your personality. Decorative boxes and bins can also help store smaller items while adding to the design.
4. Organize Strategically: Group books by color, size, or genre for visual appeal. Incorporate decorative items, such as plants or framed photos, to create an inviting and eclectic look.
5. Use of Space: Maximize vertical space with tall bookshelves and install floating shelves for a modern touch. They can also help in smaller rooms where floor space is limited.
6. Lighting Enhancements: Consider integrating LED strip lights or spotlights, especially for bookshelves that feature art or decorative items. Proper lighting can significantly enhance the overall look.
7. Incorporate Different Levels: Utilize a mix of shelf heights to accommodate books of various sizes while creating an interesting visual hierarchy.
For more design ideas and practical tips on bookshelf construction, you can explore related articles on our site, such as what are the best practices to avoid stripping screw heads and safety tips for power tool usage.
Create a Wooden Planter Box
Creating a wooden planter box is an excellent way to enhance your home’s aesthetic and provide a nurturing environment for your favorite plants. Here’s a simple guide to help you craft your own planter box effectively.
### Materials Needed
– Wood: Choose rot-resistant wood like cedar or pine for durability.
– Wood screws: Opt for exterior-grade screws to ensure longevity.
– Wood adhesive: A strong adhesive can reinforce joints.
– Protective wood finish: Consider using a non-toxic sealant to protect your wood from the elements.
### Tools Required
– Power drill: A good electric hand drill is essential for precision and ease of assembly. For more details on selecting a drill, check this article on features of good electric hand drills.
– Saw: A miter saw or circular saw will work best for cutting wood.
– Measuring tape and square: Essential for accurate measurements and ensuring square corners.
– Sandpaper: For smoothing edges and surfaces.
### Instructions
1. **Measure and Cut**: Determine the size of your planter box. Typical dimensions are 24 inches long, 12 inches wide, and 12 inches deep. Cut your wood accordingly: four sides, a bottom, and optional corner supports.
2. **Assemble the Frame**: Start by attaching the sides to the bottom piece. Use wood screws for a sturdy connection. Ensure everything is square to maintain structural integrity.
3. **Secure the Corners**: If you have corner supports, attach them now for added stability.
4. **Finishing Touches**: Sand down any rough edges and apply wood finish to protect against moisture, especially if the planter will be exposed to the elements.
5. **Drainage**: Drill holes in the bottom of the planter to prevent water pooling, which can damage plant roots.
6. **Planting**: Fill your new planter box with quality potting soil and arrange your favorite plants for an immediate burst of green in your space.
For more projects to enhance your home with power tools, browse through our other project ideas. Enjoy your gardening!
Construct a Workbench
Building a sturdy workbench is essential for any DIY enthusiast, providing a stable, functional workspace for various projects. Here’s how to construct one that suits your needs.
### Materials Needed
1. Lumber: Use 2x4s for the frame and top. Plywood is an excellent choice for the work surface due to its durability and cost-effectiveness.
2. Screws: Choose screws specifically designed for wood; they should be at least 2.5 inches long for stability.
3. Wood Glue: This can be used in conjunction with screws for added strength.
4. Finish: Consider varnishing or sealing the workbench to enhance longevity.
### Steps to Build a Sturdy Workbench
1. **Determine Size**: The standard height for a workbench is between 30-36 inches. Length can range from 4 to 8 feet, depending on your space.
2. **Construct the Frame**: Build a rectangular frame using the 2x4s. Ensure it’s square by measuring the diagonals.
3. **Attach Legs**: Cut four 2x4s to the desired height and attach them to each corner of the frame. Reinforce with diagonal supports if necessary.
4. **Add a Bottom Shelf**: This adds extra storage and stability. Use more plywood for this.
5. **Attach the Work Surface**: Secure the plywood or laminate on top of the frame using wood screws, ensuring it’s flush with the edges.
6. **Finishing Touches**: Sand the surface to prevent splinters, and apply a finish to protect it from moisture and damage.
### Essential Features
– **Stability**: Use thick lumber for the frame to ensure it doesn’t wobble.
– **Storage Space**: Incorporate shelves or drawers underneath for tools and materials.
– **Mobility**: If you need a portable bench, consider adding locking casters to the legs.
Utilizing these steps will help you create a workbench that not only meets your DIY needs but also stands the test of time. For more DIY project tips, check out our articles on Power Tool Usage Projects and Best Practices for Power Tools.
Make a Picture Frame
Creating custom picture frames is a rewarding DIY project that allows you to showcase your cherished memories uniquely. Here are some key steps to guide you in crafting your own frames:
1. **Choose Your Materials**: Select wood, metal, or upcycled materials that fit your style. Plywood is a popular choice for its durability, while reclaimed wood adds a rustic charm.
2. **Measure and Cut**: Measure the dimensions of the photo you wish to frame. Use a saw to cut your material accordingly—ensure that your cuts are straight and precise for a polished finished look.
3. **Sand and Prepare**: Smooth the edges and surfaces of your frame using fine-grit sandpaper. This step is crucial for avoiding splinters and achieving a clean finish.
4. **Assemble the Frame**: Join the corners of the frame using wood glue or screws, depending on the sturdiness you need. For intricate designs, consider using miter joints which add a professional appearance.
5. **Finish and Decorate**: Apply paint, stain, or varnish to protect and enhance the frame’s look. You can also add embellishments such as photographs, decorative paper, or even LED lights to personalize it further.
6. **Insert a Backing**: Don’t forget to add a backing to hold your picture in place. Cardboard or thin plywood works well here, and consider making it easy to open if you intend to change the pictures often.
7. **Hang or Display**: Finally, decide how to display your frame. Whether it’s wall-mounted or set on a table, ensure it highlights your memories effectively.
For more tips on DIY projects and safety practices when using tools, explore our articles on power tool usage in various projects here: Power Tool Usage Projects and Safety Tips for Power Tools. Happy framing!
Build a Floating Shelf
Designing and creating stylish floating shelves can significantly enhance your home decor while maximizing your space. Here are some key considerations and tips for your project:
### 1. Materials:
– **Solid Wood**: This is the preferred material for its durability and aesthetic appeal. Options like oak, walnut, and maple are ideal for a stylish and robust look.
– **Plywood**: An economical alternative, plywood can be finished with veneer or paint for a polished look.
– **Metal**: For a modern and industrial feel, metal shelves can be striking and provide good weight support.
### 2. Design Styles:
– **Minimalist**: Clean lines and simple shapes contribute to a sleek look that complements modern decor.
– **Rustic**: Incorporating reclaimed wood adds warmth and character, perfect for farmhouse-style interiors.
– **Floating with Brackets**: Use hidden brackets for a floating illusion, enhancing the space without visual clutter.
### 3. Maximizing Space:
– **Vertical Focus**: Install shelves higher up on walls to draw the eye upward, making the room appear taller.
– **Corner Shelves**: Utilize corner spaces that often go unused by creating L-shaped or triangular shelves.
– **Display and Storage**: Combine decorative items with functional storage to make the most of the space. Consider using bins or baskets on the shelves.
### 4. Installation Tips:
– **Studs**: Always anchor shelves into wall studs for stability. Use a stud finder to locate them accurately.
– **Leveling**: Use a level during installation to ensure shelves are straight and evenly aligned.
– **Weight Distribution**: Distribute weight evenly and avoid overloading shelves to maintain their integrity.
### 5. Personal Touches:
– **Customization**: Consider custom sizes and finishes that match your personal style and home aesthetic.
– **Paint or Stain**: Use paint or stain to match your existing decor, allowing shelves to either blend in or stand out as a feature.
For more on DIY projects involving power tools that can assist you in creating beautiful and functional floating shelves, check out our guides on power tool usage projects.
Construct a Birdhouse
To build a charming birdhouse that invites nature into your garden and supports local wildlife, consider the following steps:
**Design and Materials**: Choose a simple yet functional design. A classic birdhouse typically includes a sloped roof for rain runoff, ventilation holes, and drainage holes to keep the interior dry. Use untreated wood, such as cedar or pine, which is durable and safe for birds. Avoid pressure-treated wood and painted surfaces, as these can emit harmful chemicals.
**Tools and Assembly**: Gather essential tools like a saw, drill, screwdriver, and tape measure. Cut the wood according to your design dimensions, ensuring that the entrance hole is appropriately sized for the target bird species. Assemble the pieces using screws for durability, and secure with a waterproof wood adhesive.
**Placement**: Hang the birdhouse at least five feet above the ground, ideally in a sheltered area with some protective foliage nearby. This placement helps birds feel secure from predators while providing easy access to food sources.
**Benefits for Birds and Garden**: Birdhouses attract local species, providing them with nesting sites and contributing to the ecosystem by controlling insect populations. Birdwatching adds to the enjoyment of gardening, creating a peaceful environment while enhancing floral pollination. By inviting birds into your garden, you also promote biodiversity, which supports a healthier and more vibrant garden environment.
For further information on tool usage and safety, check out our resources on power tool projects and safety tips.
Design a Jewelry Organizer
Jewelry organizers not only help keep your accessories neatly arranged but also serve as a reflection of your personal style. When selecting a jewelry organizer, consider materials, design, and functionality. For instance, wooden organizers offer a classic touch, while acrylic varieties provide a modern and transparent look. You might also explore felt-lined drawers to protect delicate pieces from scratches.
Additionally, personalized options are increasingly popular, allowing you to engrave your name or initials, further enhancing that unique touch. Consider incorporating vertical designs, like wall-mounted organizers, which can free up surface area and double as decorative art pieces. For a full aesthetic, select colors and finishes that resonate with your interior decor.
Notably, investing in a quality organizer doesn’t just declutter; it helps you locate your accessories quickly, reducing the chance of damage and loss. Explore various designs and materials that appeal to you, and you’ll create a beautifully organized space that aligns with your style. For more home organization tips, check our guide on home improvement projects [here](https://onepowertool.com/what-home-improvement-projects-can-be-accomplished-with-power-tools/).
Sources
- One Power Tool – Safety Tips for Using an Electric Hammer Drill
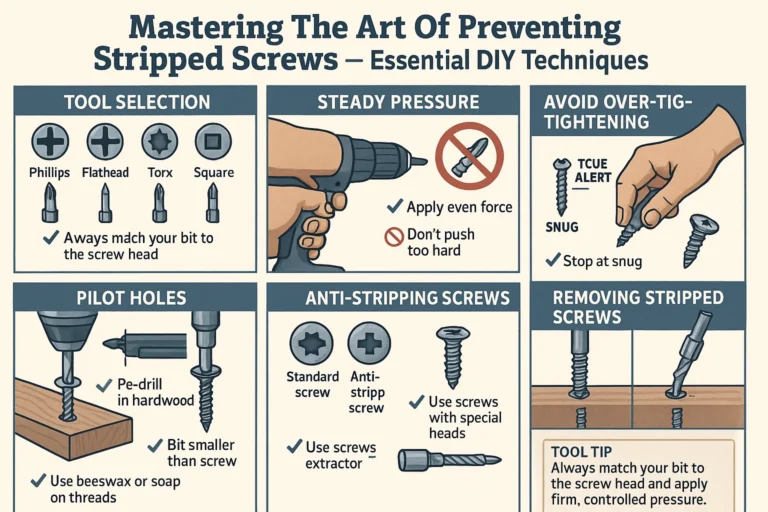
- One Power Tool – What Are the Best Practices to Avoid Stripping Screw Heads
- One Power Tool – Power Tool Batteries
- One Power Tool – Features of a Good Electric Hand Drill
- One Power Tool – Power Tool Usage Projects
- One Power Tool – Safely Removing Stripped Screws
- One Power Tool – What Home Improvement Projects Can Be Accomplished With Power Tools
- One Power Tool – Essential Power Tool Brands for Homeowners