What can I do to prevent stripped screws?
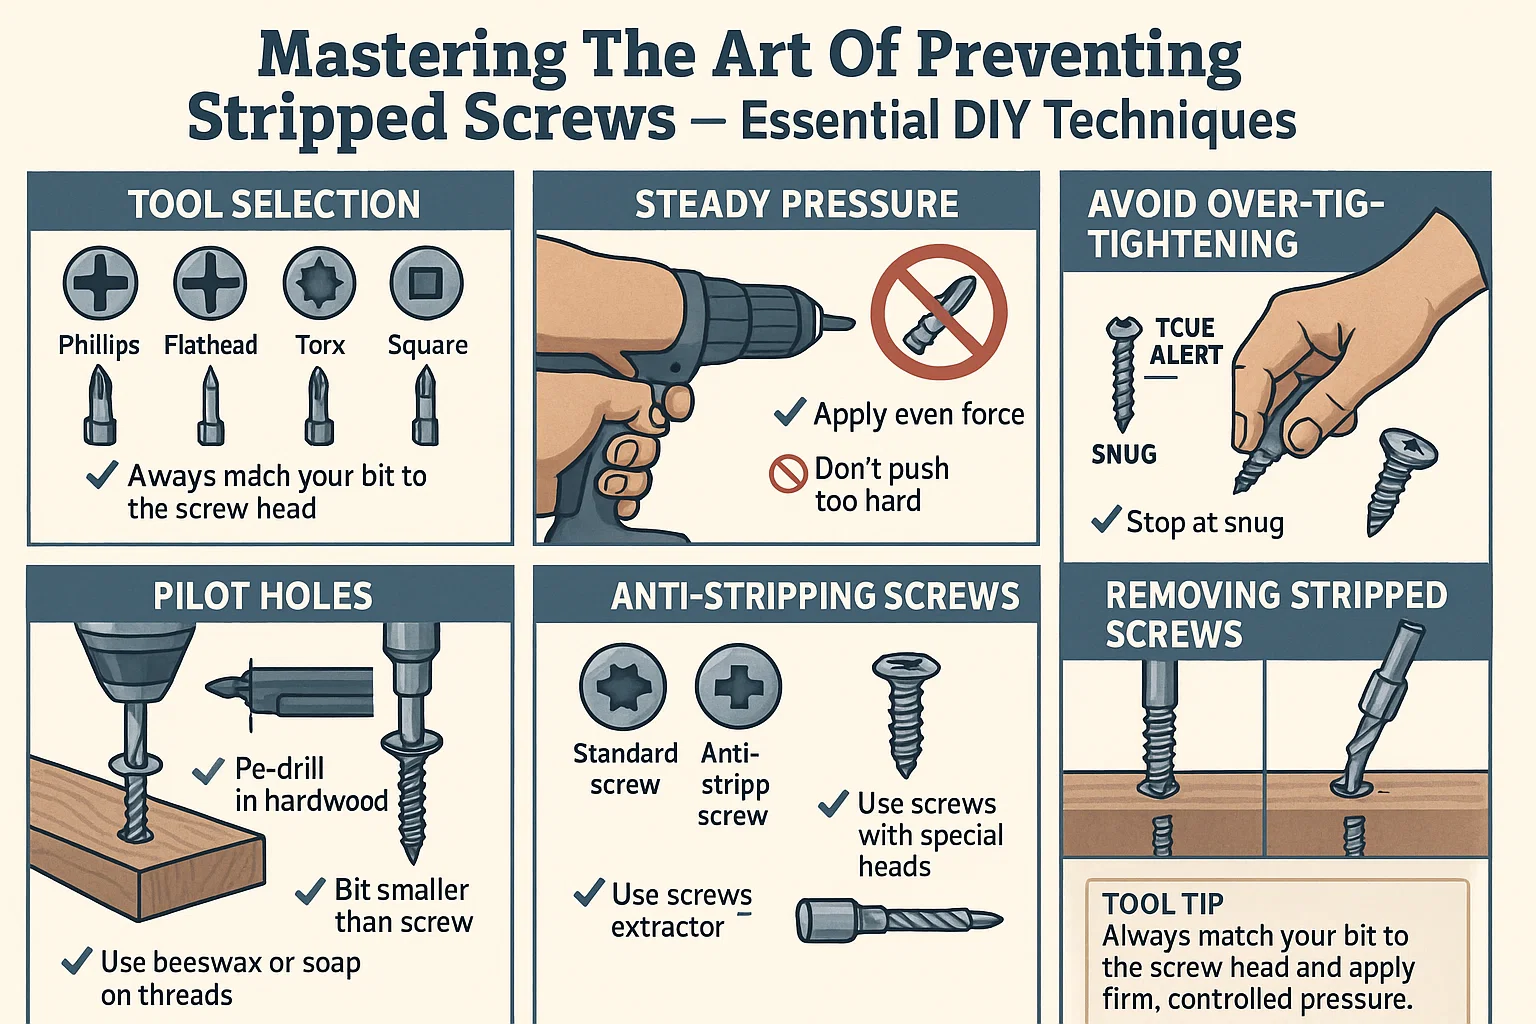
Mastering the Art of Preventing Stripped Screws: Essential Techniques for DIY Enthusiasts
Stripped screws can turn DIY projects into frustrating battles. This comprehensive guide provides you with essential strategies to prevent stripped screws and ensure smooth progress in your home improvement tasks.
Understanding Stripped Screws
Before diving into solutions, it’s helpful to understand what causes screw stripping. A screw gets stripped when the head becomes damaged due to excessive force or using incorrect tools, making it difficult or impossible to turn (Family Handyman).
1. Selecting the Appropriate Screwdriver or Drill Bit
The fundamental step in preventing stripped screws lies in choosing the right tool. Common screw head types include Phillips, flathead, Torx, and square drive – each requiring specific matching tools (Popular Mechanics).
2. Apply Consistent Pressure
When driving screws, controlling pressure is crucial. A firm, steady push is essential, but excessive force can cause slipping and damage. Allow the tool to work efficiently while maintaining a secure grip (Bob Vila).
3. Pre-Drill Pilot Holes
For dense materials like hardwoods, pre-drilling pilot holes minimizes splitting and decreases the driving force needed. Use a drill bit slightly smaller than the screw’s diameter for best results (This Old House).
4. Utilizing Lubrication
Lubricating screws with beeswax, soap, or dedicated lubricants reduces friction, allowing easier insertion and reducing stripping risk (Wood Magazine).
5. Avoid Over-Tightening
Stop applying force once the screw feels snug. Over-tightening weakens grip and increases stripping likelihood. Consult manufacturer guidelines when unsure (Pro Tool Reviews).
6. Opt for Anti-Stripping Screws
Consider screws with anti-stripping features like deeper threads or self-tapping designs for enhanced grip and resistance (Fastener Superstore).
7. Techniques for Removing Stripped Screws
When encountering stripped screws, try:
- Rubber band or steel wool for added grip
- Screw extractor tools are specifically designed for removal
Conclusion
By implementing these preventive measures – proper tool selection, controlled pressure, pilot holes, lubrication, and anti-stripping screws – you’ll significantly reduce stripped screw incidents in your DIY projects.
Sources
- Bob Vila – How to Remove a Stripped Screw
- Family Handyman – How to Remove a Stripped Screw
- Fastener Superstore – Anti-Strip Screws
- Popular Mechanics – How to Remove a Stripped Screw
- Pro Tool Reviews – How to Avoid Stripping Screws
- This Old House – How to Drill Pilot Holes
- WikiHow – Remove a Stripped Screw
- Wood Magazine – Lubricate Screws